-
Designing User Interfaces in Playgrounds
Note: Updated for Swift 2.0 and Xcode 7 beta 4
I have an on-off relationship with the Interface Builder. In the last projects I tried to use it and I like it a lot for prototyping. But the more complex a project gets the more I hate it. It does take to long to load and often I have to search for the one setting in the different inspectors to get what I want.
One of the thinks I miss, when I don't use the Interface Builder is the interface preview one get while working on the interface. I have started now to use Playgrounds for this.
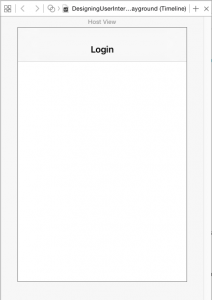
Let's for this post assume you want to create a login screen for an app. Open a Playground and put in the code:
import UIKit
import XCPlayground

let hostView = UIView(frame: CGRect(x: 0, y: 0, width: 320, height: 480))

hostView.layer.borderWidth = 1
hostView.layer.borderColor = UIColor.grayColor().CGColor
hostView.backgroundColor = .whiteColor()

XCPShowView("Host View", view: hostView)
Go to View/Assistant Editor/Show Assistant Editor. You should see something like this:

The app is going to have a navigation bar on the login screen. So add the following code at the end of the Playground:
let navigationBar = UINavigationBar(frame: CGRect.zeroRect)
navigationBar.setTranslatesAutoresizingMaskIntoConstraints(false)
navigationBar.setItems([UINavigationItem(title: "Login")], animated: false)
hostView.addSubview(navigationBar)

let views = ["navigationBar": navigationBar]
var layoutConstraints = [NSLayoutConstraint]()
layoutConstraints += NSLayoutConstraint.constraintsWithVisualFormat("|[navigationBar]|", options: [], metrics: nil, views: views)
layoutConstraints += NSLayoutConstraint.constraintsWithVisualFormat("V:|[navigationBar(64)]", options: [], metrics: nil, views: views)
NSLayoutConstraint.activateConstraints(layoutConstraints)
In the Assistant Editor you should see this:
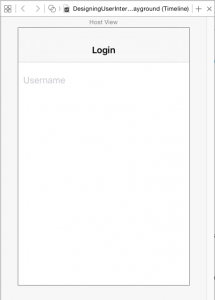
To add a text field add the code
let usernameTextField = UITextField(frame: CGRect.zeroRect)
usernameTextField.setTranslatesAutoresizingMaskIntoConstraints(false)
usernameTextField.placeholder = "Username"
usernameTextField.borderStyle = .Line

hostView.addSubview(usernameTextField)
before the definition of the constrains. Change the constraints to
let views = ["navigationBar": navigationBar, "usernameTextField": usernameTextField]
hostView.addConstraints(NSLayoutConstraint.constraintsWithVisualFormat("|[navigationBar]|", options: nil, metrics: nil, views: views))
hostView.addConstraints(NSLayoutConstraint.constraintsWithVisualFormat("|-[usernameTextField]-|", options: nil, metrics: nil, views: views))

hostView.addConstraints(NSLayoutConstraint.constraintsWithVisualFormat("V:|[navigationBar(64)]-20-[usernameTextField(30)]", options: nil, metrics: nil, views: views))
The preview then looks like this:
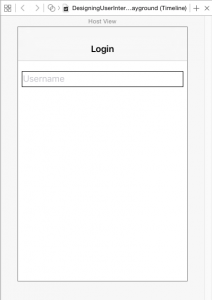
Uh!?! That looks really bad! In fact this is a bug in Playground. To fix this, either don't use Auto Layout, add the statement usernameTextField.contentMode = .Redraw or add usernameTextField.setNeedsDisplay() at the end of the Playground.
If you have to use different code in the Playground than later in the real app the Playground is kind of useless. For a quick and very dirty fix add usernameTextField.setNeedsDisplay() at the end of the Playground.
The textfield now looks like it should:
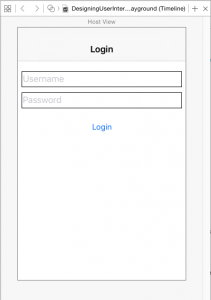
After adding a second text field for the password and a button for the login action the code looks like this:
import UIKit
import XCPlayground

let hostView = UIView(frame: CGRect(x: 0, y: 0, width: 320, height: 480))

hostView.layer.borderWidth = 1
hostView.layer.borderColor = UIColor.grayColor().CGColor
hostView.backgroundColor = .whiteColor()

XCPShowView("Host View", view: hostView)

let navigationBar = UINavigationBar(frame: CGRect.zeroRect)
navigationBar.translatesAutoresizingMaskIntoConstraints = false
navigationBar.setItems([UINavigationItem(title: "Login")], animated: false)

let usernameTextField = UITextField(frame: CGRect.zeroRect)
usernameTextField.translatesAutoresizingMaskIntoConstraints = false
usernameTextField.placeholder = "Username"
usernameTextField.borderStyle = .Line

let passwordTextField = UITextField(frame: CGRect.zeroRect)
passwordTextField.translatesAutoresizingMaskIntoConstraints = false
passwordTextField.placeholder = "Password"
passwordTextField.borderStyle = .Line
passwordTextField.secureTextEntry = true

let loginButton = UIButton(type: .System)
loginButton.translatesAutoresizingMaskIntoConstraints = false
loginButton.setTitle("Login", forState: .Normal)

hostView.addSubview(navigationBar)
hostView.addSubview(usernameTextField)
hostView.addSubview(passwordTextField)
hostView.addSubview(loginButton)

let views = ["navigationBar": navigationBar, "name": usernameTextField, "password": passwordTextField, "button": loginButton]
var layoutConstraints = [NSLayoutConstraint]()
layoutConstraints += NSLayoutConstraint.constraintsWithVisualFormat("|[navigationBar]|", options: [], metrics: nil, views: views)
layoutConstraints += NSLayoutConstraint.constraintsWithVisualFormat("|-[name(password,button)]-|", options: [], metrics: nil, views: views)
layoutConstraints += NSLayoutConstraint.constraintsWithVisualFormat("V:|[navigationBar(64)]-20-[name(30)]", options: [], metrics: nil, views: views)
layoutConstraints += NSLayoutConstraint.constraintsWithVisualFormat("V:[name(30)]-10-[password(30)]-20-[button]", options: [.AlignAllLeading, .AlignAllTrailing], metrics: nil, views: views)
NSLayoutConstraint.activateConstraints(layoutConstraints)

hostView.subviews.map { $0.setNeedsDisplay() }
The result in the Assistant Editor looks like this:
Read more...
-
Phy Update Diary: @3x
In the Phy Update Diary I'm writing about the process of updating the first App I have ever put into the App Store.
The formulas in [Phy](https://itunes.apple.com/de/app/phy-physics-formulas-calculator/id325836855?l=en&mt=8) are png images created using LaTeX. I used LaTeX because the formulas then look so good. Here is an example:
documentclass{article}
usepackage{amsmath}
begin{document}
pagestyle{empty}
hoffset = -5cm
voffset = -4.2cm
$F = gamma frac{m _1 , m _2}{r ^{2}} , frac{vec r}{| vec r |}$
end{document}
creates

(Fun fact: While putting together this blog post I realized that his formula is wrong. There is a vector sign missing on the `F`. :))
I already have the pngs for the formulas in the current version but for the update I need to have in addition @3x version for the iPhone 6 and the iPhone 6+. When Apple released the iPhone 4 with its Retina display I had the same problem (yes, Phy is that old). To create the @2x (and now the @3x images) I used a shell script that takes all `.tex` files and creates images with different resolutions (essentially it just changes the DPI of the output).
Here is the script to generate the @2x and the @3x images an copy them to the project folder.
#!/bin/bash

while [ -n "$1" ]
do
        name1=$1
        name2=${name1/'.tex'}
        echo $name2
        latex $name2
        dvipng -D 300 $name2.dvi -o $name2@2x.png
        cp $name2@2x.png ~/Documents/development/Phy/Phy/Resources/images/
        rm $name2.div $name2.log $name2.log $name2.aux

        dvipng -D 450 $name2.dvi -o $name2@3x.png
        cp $name2@3x.png ~/Documents/development/Phy/Phy/Resources/images/
        rm $name2.div $name2.log $name2.log $name2.aux

        shift
done
If you have comments or questions about this post, ping me on App.net or Twitter.
Read more...
-
Phy Update Diary: Fill The Realm Database
As described in the previous post I had to get the data out of the plist which is used in the current version of Phy and put it into the Realm database. As the structure of the plist reflects the very limited knowledge I had when I started with iPhone Os development in 2009, I first had to remove all the unneeded information. To do that I wrote a Swift script which opens the plist as a dictionary and walks through the data and puts the needed information into another much cleaner plist.
This cleaner plist represents the data of the app and a starting point for future additions of formulas.
But within the app I wanted to use Realm as the database. So I needed to find a way to get the data out of the plist into the realm db.
First I thought I could use a Swift Playground. So I added Realm to the frameworks path of Xcode. This allowed to import Realm but whenever I tried to add a Realm object to the Playground, it stopped executing. Realm needs libc++. So maybe this lib is missing in Playgrounds. I don't know and I don't want to figure out at the moment.
So the next idea was to use a command line tool to fill it. And this is what I did. I added the OS X Realm framework and the realm model from the iOS App to the Mac app and implemented the code to fill the Realm database. This is the function that does the main work:
func fillRealmDBFrom(array: [[String:AnyObject]], categoryName: String) -> RLMArray {

    var resultArray = RLMArray(objectClassName: Object.className())

    for dictionary in array {
        let object = Object()

        object.name = dictionary["name"] as? String ?? ""

        object.image = dictionary["image"] as? String ?? ""

        if let details = dictionary["details"] as? [[String:AnyObject]] {
            object.details = fillRealmDBFrom(details, object.name)
        }

        object.categoryName = categoryName

        resultArray.addObject(object)
    }

    return resultArray
}
It's still not perfect because I have to clean the build folder after each run otherwise the Mac app doesn't find the Realm framework. But for me it's good enough because I'll have to run the Mac app only a few times when I add new formulas.
**Update:** As Tammo suggested in his comment I removed the `if` statement in favour or the `??` operator.
Read more...
-
Phy Update Diary: Setup
In the Phy Update Diary I'm writing about the process of updating the first app I ever put into the App Store.
Here is the setup for the Phy update:
## Quick
I will use [Quick](https://github.com/Quick/Quick) and [Nimble](https://github.com/Quick/Nimble) for the behavior tests. This is new to me. In the past I have used the build in XCTest frame work from Apple.
The installation of Quick is very easy. I just had to follow the instructions of the github page.
Because I'm not used to behavior tests I expect my tests to be a mix match of unit tests and behavior tests.## Realm
I will use [Realm](http://realm.io) as the database to store the formulas. Fist I tried to install Realm using the dynamic frameworks because I plan to only support iOS 8. But this didn't work. The linker complained that it could not find the framework. So I tried to install the normal framework and that worked.## Getting the data out of the previous version
In the version which is currently in the App Store used a plist to store the data. This is because the example in the book from which I learned iPhone OS development used a plist. At that time I had no idea that something like sqlite or Core Data existed.
The plist had the advantage that is was quite easy to add data to it. But the structure reflects my experience at that time. For example I have arrays with sections and another property with the number of sections and the title for the sections. So there is a lot of repeated information in the plist.
The first tries updating Phy used the same plist (never touch a running system). But it was quite difficult to understand why and what I had tried to solve with the complicated structure.So this time I want to store the data in a more logical and easier to maintainable form. So I had to get the data out of the plist. First I put the data into another plist (using a Swift Playground) reducing the complexity by removing the repeated information. In a second step I used the generated plists to fill the Realm database. More about this step in the next diary post.
Read more...
-
Updating Phy
I started iOS development in 2009 because I wanted to have a physics formula collection for my iPod touch. I searched the App Store for such an App but there where only unusable apps which basically had a series of scann images from formula collections from books.
So I learned Objective-C and the iPhone OS SDK (this was the name of the iOS SDK back then because there was no iPad yet). Half a year later I had the first version of [Phy](https://itunes.apple.com/de/app/phy-physics-formulas-calculator/id325836855?l=en&mt=8) in the App Store. I was bad. Really bad but it worked and was still the best physics formula collection back then. I used it a lot because I was physics teacher in an university at that time.
Over the years it became a quite good app with really bad and hardly maintainable code. I basically used an example from the book I used to learn development from and expanded it more or less without really knowing what I was doing.
In the past years I started several times to rewrite it from scratch but every time I found something more interesting on the way and abandoned the update. Now is again the time to try an update.
To keep me interested in the project I have to find things which are new and exciting. Therefore I will use Swift (a programming language I'm still trying to learn) and [Realm](http://realm.io) (a database design especially for the use in mobile devices).
And to increase the pressure to finish the update I will start an update diary here on my blog. So stay tuned for the small steps and the success and failure on the way to the update of Phy.
Read more...
-
Open Files In Swift Playgrounds
A Swift Playground is a great way to prototype functions and classes for iOS and Mac development. Recently I needed a script to read out parts of a wordpress export file and fill the contents into a JSON file. The problems with Swift scripts and Xcode is, that I did not manage to get autocompletion. The autocompletion seems to be bound to projects.
I could have created a project for the development of the classes for the script. But in Xcode 6 there are playgrounds. Instant feedback for the win!
As I needed to read in an xml file I needed a way to open the file in a playground.
First I needed to find the share folder for the playgrounds.
import XCPlayground

let directoryPath = XCPSharedDataDirectoryPath
In my case the folder was at the location
/var/folders/md/7lcqg1rx07d0h3q9yp91hhdr0000gn/T/com.apple.dt.Xcode.pg/containers/com.apple.dt.playground.stub.iOS_Simulator.ChangesStructureOfPhyPlist-62D0E009-7FDB-4D1A-A42F-F15CE5BBDDB9/Documents/Shared Playground Data
This is actually a symbolic link. It points to
/Users/dom/Documents/Shared Playground Data
In my case there wasn't a folder at this location so I created one. I moved the wordpress.xml file to into the shared folder. To open it in the playground I then only had to type
let path = XCPSharedDataDirectoryPath.stringByAppendingPathComponent("wordpressSmall.xml")

let inputData = NSData(contentsOfFile: path)
And the fun could begin.
Comments? Ping me on Twitter and App.net.
Read more...
-
Building iOS8 Apps Without Interface Builder
I don't like the Interface Builder. In Xcode 5 people like me could chose the empty project template. This template was meant to be used in projects without xibs or storyboards. In Xcode 6 this template is gone. So let's use one of the given templates and remove the storyboard.
Start Xcode and create a new project. In the template chooser select the Single View Application template.

Give it a name an a place to be stored. Then remove the storyboard.

Remove the storyboard in the Deployment Info of you Target (delete the "Main" in the "Main Interface" drop down; leave it empty).

Initialize the window and make it key and visible in the application delegate.
func application(application: UIApplication!, didFinishLaunchingWithOptions launchOptions: NSDictionary!) -> Bool {
        window = UIWindow(frame: UIScreen.mainScreen().bounds)

        window!.rootViewController = ViewController(nibName: nil, bundle: nil)
        window!.makeKeyAndVisible()
        window!.backgroundColor = UIColor.whiteColor()
        return true
    }
Done. Enjoy the clean and pure code project.
Read more...
-
Accessing the Keychain in Swift
**tl;dr**: If your Swift code always gets nil from the keychain in Release builds, try to set Swift Compiler - Optimization Level to `-Onone`. Took me a day to find this solution.
Recently I published an app with a share extension which needed access the keychain in the host app and the share extension (like in [this demo](http://dasdev.de/2014/08/12/ios8-share-extension-with-a-shared-keychain/)).
Everything worked great until I submitted to the App Store. The tester at Apple hat a crash right at the start of the app. To investigate the crash I took the archive and resigned it for Ad Hoc distribution to put it onto my iPhone. And yes, the app crashed right at the start.
To make sure I tested again the debug build and everything works great again.
One of the main differences between App Store builds and Debug builds is the build configuration. The App Store build uses Release builds. So I changed the debug scheme to use the Release configuration. The app crashed right at the beginning.
I searched the internet for similar experiences and solutions. I found similar problems but no solution. A lot of questions about this topic were about problems during the beta phase of Swift. I tried to pin down the problem to the line it was happening (all without the ability to break in the code because it only happened in Release builds).
I finally found out that items I got from the keychain always were nil. I searched again and in the end the second comment on [this answer](http://stackoverflow.com/a/24197966/498796) was the solution. I switched the Swift Compiler - Optimization Level to `-Onone` and it worked.
Read more...
-
Tweet in iOS using Swift
First import `Accounts`, `Social` and get the account store
import Accounts
import Social

...

    override func viewDidLoad() {
        super.viewDidLoad()

        accountStore = ACAccountStore()

    }
Present the user a table view with all the Twitter account which are set in the Settings app
let accountType = accountStore!.accountTypeWithAccountTypeIdentifier(ACAccountTypeIdentifierTwitter)

println("accountType: (accountType)")

accountStore!.requestAccessToAccountsWithType(accountType, options: nil, completion: { [unowned self] (granted, error) in
    println("granted: (granted)")
    self.accounts = self.accountStore?.accounts
    dispatch_async(dispatch_get_main_queue(), { () -> Void in
        self.tableView.reloadData()
    })
})
When the user selects an account she wants to user for tweeting, save the account id in
NSUserDefaults:override func tableView(tableView: UITableView, didSelectRowAtIndexPath indexPath: NSIndexPath) { let account = accounts![indexPath.row] as ACAccount if activeAccountId == account.identifier { activeAccountId = nil } else { activeAccountId = account.identifier } NSUserDefaults.standardUserDefaults().setObject(activeAccountId, forKey: kActiveAccountIdKey) NSUserDefaults.standardUserDefaults().synchronize() tableView.reloadData() }Now you are ready to tweet. Get the account and make a tweet request:
if let accountIdentifier = NSUserDefaults.standardUserDefaults().stringForKey(kActiveAccountIdKey) {
    let parameters = ["status" : "Awesome Tweet!"]
    let tweetRequest = SLRequest(forServiceType: SLServiceTypeTwitter, requestMethod: .POST, URL: NSURL(string: "https://api.twitter.com/1.1/statuses/update.json"), parameters: parameters)

    let account = accountStore?.accountWithIdentifier(accountIdentifier)
    tweetRequest.account = account
    tweetRequest.performRequestWithHandler { (tweetData, tweetResponse, tweetError) in
        println("error: (tweetError)")
        println("tweetResponse: (tweetResponse)")
    }
}
Done.
If you have any comments about this post, you can find my on [Twitter](https://twitter.com/dasdom) or [App.net](https://app.net/dasdom).
Read more...
-
Adjust for the Keyboard in iOS Using Swift
Let's say you have an app with a text view which should just take all the space possible without being beneath the keyboard.
Fist add constraints which pin the text view to all four edges of the super view.

Ctr-drag from the bottom constraint to the view controller to make an outlet for the constraint. This will allow you to change the constant of the bottom constraint.

Add the view controller as an observer for the notification UIKeyboardWillShowNotification in viewDidLoad() and set the constant of the bottom constraint to 0.0 to make the text view take all the available space at the beginning:
override func viewDidLoad() {
        super.viewDidLoad()

        NSNotificationCenter.defaultCenter().addObserver(self, selector: "keyboardWillShow:", name: UIKeyboardWillShowNotification, object: nil)

        textViewBottomConstraint.constant = 0.0
    }
Add the method which gets called when the notification is triggered by the system:
func keyboardWillShow(sender: NSNotification) {
        if let userInfo = sender.userInfo {
            if let keyboardHeight = userInfo[UIKeyboardFrameEndUserInfoKey]?.CGRectValue().size.height {
                textViewBottomConstraint.constant = keyboardHeight
                UIView.animateWithDuration(0.25, animations: { () -> Void in
                    self.view.layoutIfNeeded()
                })
            }
        }
    }
The code does
- get the userInfo dictionary from the notification (line 2)
- get the height of the keyboard (line 3)
- set the constant of the bottom constraint (line 4)
- animate to the value of the constraint (line 5-7)
Done!
Read more...


subscribe via RSS