How To Build An App Without Interface Builder - Part 6: Show Data
In part 5 we have seen how we can add birthdays to the app. But the data was just printed to the debug console.
In this post we want to implement that the birthdays we add are actually shown in the birthday list.
Open BirthdaysListDataProvider and add the following property:
private var birthdays = [Birthday]()
Add the following code outside of the BirthdaysListDataProvider class:
extension BirthdaysListDataProvider {
  func addBirthday(birthday: Birthday) {
    birthdays.append(birthday)
  }
}
Replace the code inside of
tableView(_:numberOfRowsInSection:)
with this:
return birthdays.count
Replace the line cell.textLabel?.text = "Row: (indexPath.row)" with the following code:
let birthday = birthdays[indexPath.row]
cell.textLabel?.text = birthday.firstName
Now open BirthdaysListViewController and add the following code in the body of the if clause of contactPicker(_:didSelectContact:):
dataProvider?.addBirthday(person)
tableView.reloadData()
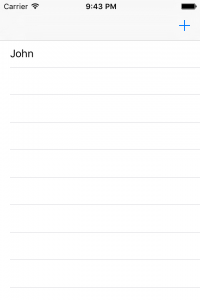
Build and run. Tap the plus button and select John Appleseed. You should see something like this:

Great! Now we need a cell that actually can show the name of the person and his/her birthday. Let's add a first version of a custom table view cell. Remember, later we want to have a nice progress show in the cell behind the name. But for now it is enough to show the name and the birthday.
Select File / New / File..., chose iOS / Source / Cocoa Touch Class, click Next. Put in the name BirthdayCell, make it a subclass of UITableViewCell and click Next. Select the BirthdaysList folder and click Create. Open the new created class and remove the two methods from the Xcode template.
Add these two properties:
let nameLabel: UILabel
let birthdayLabel: UILabel
Xcode will complain that
Class 'BirthdayCell' has no initializers
True. But we are going to change that. Add these two initializers:
override init(style: UITableViewCellStyle, reuseIdentifier: String?) {

    nameLabel = UILabel()
    nameLabel.translatesAutoresizingMaskIntoConstraints = false

    birthdayLabel = UILabel()
    birthdayLabel.translatesAutoresizingMaskIntoConstraints = false

    super.init(style: style, reuseIdentifier: reuseIdentifier)

    addSubview(nameLabel)
    addSubview(birthdayLabel)

    let views = ["name": nameLabel, "birthday": birthdayLabel]
    var layoutConstraints = [NSLayoutConstraint]()

    layoutConstraints.append(nameLabel.centerXAnchor.constraintEqualToAnchor(centerXAnchor))
    layoutConstraints.append(nameLabel.centerYAnchor.constraintEqualToAnchor(centerYAnchor))
    layoutConstraints += NSLayoutConstraint.constraintsWithVisualFormat("[birthday]-|", options: [], metrics: nil, views: views)
    layoutConstraints += NSLayoutConstraint.constraintsWithVisualFormat("V:[birthday]|", options: [], metrics: nil, views: views)

    NSLayoutConstraint.activateConstraints(layoutConstraints)
  }

  required init?(coder aDecoder: NSCoder) {
      fatalError("init(coder:) has not been implemented")
  }
The constrains in the initializer center the nameLabel and put the birthdayLabel at the bottom right corner. The second initializer is needed because it is a required initializer of UIView and in Swift we need to implement all required initializer as soon as we implement one initializer ourselves.
No let's use our new shiny table view cell. Open BirthdaysListDataProvider.swift and replace in registerCellsForTableView(_:) UITableViewCell.self with BirthdayCell.self.
Replace the code in tableView(_:cellForRowAtIndexPath:) with this:
let cell = tableView.dequeueReusableCellWithIdentifier(cellIdentifer, forIndexPath: indexPath) as! BirthdayCell

let birthday = birthdays[indexPath.row]
cell.nameLabel.text = birthday.firstName
cell.birthdayLabel.text = "\(birthday.birthday.day) \(birthday.birthday.month)"

return cell
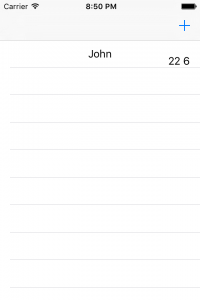
Build and run. Add a person to the list. The result should look like this:
That's it for today. Next time we will make the table view cell nicer.
