How To Build An App Without Interface Builder - Part 5: Data Model
In part 4 of this series we have implemented the bare bones of the view controller and the data source for the table view. Before we can flesh out those classes, we need a data model to store the data in.
Let's use a struct for the data model because this is the way to go in Swift. Go to File / New / File... and select an iOS / Source / Swift File. Put in the name Birthday create a new folder called Model and click two times Create. You end up with an empty swift file. Ok, it's not completely empty. There is a comment and it imports Foundation.
Put in the following struct definition:
struct Birthday {
    let firstName: String
    let lastName: String
    let birthday: NSDateComponents
}
For now this is the complete model implementation. We will later add archiving and unarchiving to this model. But for now it is enough to keep the code flowing. :)
The app should allow the addition of birthdays of friends and family the user have in their address book. So we need a button somewhere. It is very common in an app showing a table view to have buttons in a navigation bar. To add a navigation bar we will put the view controller into a navigation controller. This has the additional benefit that we can easily navigate to detail views later in the implementation.
Open AppDelegate.swift and replace the line:
window!.rootViewController = viewController
with this code:
window!.rootViewController = UINavigationController(rootViewController: viewController)
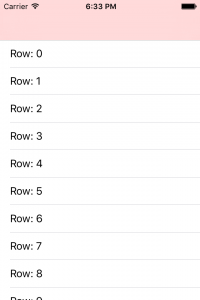
This code adds a navigation controller to the app. Build and run the app to see how it looks like. You should see something like this:

The color of the navigation bar comes from the color of the table view. Let's get rid of the color because it was only set for debugging. Open BirthdaysListViewController.swift and remove the line:
view.backgroundColor = .redColor()
Build and run again. Now this looks much better. Not good, but better. :)
To add a bar button item, add the following code to viewDidLoad():
let addButton = UIBarButtonItem(barButtonSystemItem: .Add, target: self, action: "addPerson")
navigationItem.rightBarButtonItem = addButton
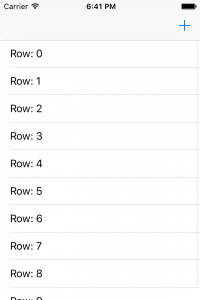
Build and run again. You should see a plus sign in the navigation bar like this:

When the user taps the button, a view controller should appear where she can select the friend whose birthday she wants to remember. Apple already provides such a view controller for us: CNContactPickerViewController. And the good thing is, because this view controller is controlled by UIKit you don't need to ask the user for permission to access the address book.
To use it, import ContactsUI:
import ContactsUI
and add the following method to the BirthdaysListViewController class:
func addPerson() {
  let picker = CNContactPickerViewController()
  picker.delegate = self
  presentViewController(picker, animated: true, completion: nil)
}
The compiler will complain because BirthdaysListViewController doesn't conform to the protocol CNContactPickerDelegate. Add the following code outside of the BirthdaysListViewController class:
extension BirthdaysListViewController: CNContactPickerDelegate {
  func contactPicker(picker: CNContactPickerViewController, didSelectContact contact: CNContact) {
    print("name: \(contact.givenName) \(contact.familyName), birthday: \(contact.birthday)")
  }
}
Build and run. In the running app tap the add button in the navigation bar and select a contact. You should see the name and birthday printed to the debug console:
name: Kate Bell, birthday: Optional(<NSDateComponents: 0x7b787ca0>
    Calendar: <_NSCopyOnWriteCalendarWrapper: 0x7b783760>
    Calendar Year: 1978
    Month: 1
    Leap month: no
    Day: 20)
If the contact from the address book has the birthday set, we should create a Birthday instance from that data. Add the following code in contactPicker(_:didSelectContact:):
if let birthday = contact.birthday {
  let person = Birthday(firstName: contact.givenName, lastName: contact.familyName, birthday: birthday)
  print(person)
}
At the moment we only print the birthday. Later we will hand that data to the data source of the table view to update the UI.
That's it for today. See you next time. :)