How To Build An App Without Interface Builder - Part 4: DataSource
As mentioned in Part 3 we will proceed this series without using TDD.
In this part we will add a data source for the table view and we will configure it to show some dummy cell to make sure we have set up everything correctly.
So, we already have a view controller, BirthdaysListViewController, which is a subclass of UITableViewController. Xcode automatically adds some methods to start with. But we want to start with a blank slate. So delete everything except the following code:
import UIKit

class BirthdaysListViewController: UITableViewController {

}
Now let's make sure this view controller is loaded when the app starts. Add the following code within the class BirthdaysListViewController:
override func viewDidLoad() {
  view.backgroundColor = .redColor()
}
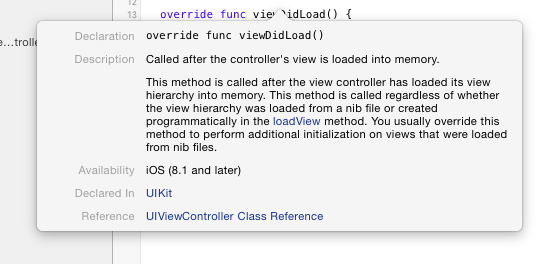
You're probably wondering why there is no super.viewDidLoad() in this method. The reason is, it's not mentioned in the documentation. To see the documentation of a method, option click on it. You would see something like this:

If you have to call super, this is mentioned in the documentation. For example in case of viewWillAppear(_:) the documentation reads:

The last sentence:
If you override this method, you must call
superat some point in your implementation.
Build and run (⌘R). You should see something like this:

Uh, that is not what we expected. We set the background color to red. But the view that is presented on screen is still yellow.
The reason for this is, that we are loading the wrong view. Remember, we are not using Interface Builder. So we have to write code that tells our app what view controller should be loaded when the app starts.
Open AppDelegate.swift and change the line:
window!.rootViewController = ViewController()
to
window!.rootViewController = BirthdaysListViewController()
Build and run again. You should see something like this:

It worked. We are loading the correct initial view.
Delete ViewController.swift because we won't gonna need it anymore.
Let's bring some dummy cells on screen to see how this works. Usually the table view controller is also the data source and the delegate of a table view. But this often leads to a massive table view controller. Massive view controller should be avoided because they are hard to maintain and therefore prone to having bugs. In an ideal case the view controller is responsible for bringing the view on screen and for allowing navigation to an other screen.
Select File / New / File..., chose a iOS / Source / Cocoa Touch Class, click Next, put in the name BirthdaysListDataProvider, make it a subclass of NSObject and click Next. Select to store it in the BirthdaysList folder and click Create.
Open BirthdaysListDataProvider.swift and change the class definition to:
class BirthdaysListDataProvider: NSObject, UITableViewDataSource {

}
UITableViewDataSource is a protocol and by adding it in the class declaration you are telling UIKit that this class will conform to this protocol.
Xcode complains that this class does not conform to the protocol UITableViewDataSource:

The reason is, UITableViewDataSource has two required methods: tableView(_: numberOfRowsInSection:) and tableView(_:cellForRowAtIndexPath:).
Add the following code with in the BirthdaysListDataProvider class:
func tableView(tableView: UITableView, numberOfRowsInSection section: Int) -> Int {
  return 10
}

func tableView(tableView: UITableView, cellForRowAtIndexPath indexPath: NSIndexPath) -> UITableViewCell {
  let cell = tableView.dequeueReusableCellWithIdentifier("Cell", forIndexPath: indexPath)

  cell.textLabel?.text = "Row: \(indexPath.row)"

  return cell
}
We are not finished yet. We need to register the class to use for the table view cell before we can dequeue a reusable cell. This is normally done in Interface Builder by adding a cell to a table view. As we don't use the Interface Builder, we need to do this ourselves. Add the following method at the beginning of the BirthdaysListDataProvider class:
func registerCellsForTableView(tableView: UITableView) {
  tableView.registerClass(UITableViewCell.self, forCellReuseIdentifier: "Cell")
}
And we already have some code smell. The string 'Cell' is hard coded at two different places. Let's fix that. Add the private property:
private let cellIdentifer = "Cell"
and change the hard coded strings to use this property.
Now we need to tell the table view to use our shiny new class as the datasource. Open BirthdaysListViewController.swift and add the property:
var dataProvider: BirthdaysListDataProvider?
To set the data source, add following code at the end of viewDidLoad():
tableView.dataSource = dataProvider

dataProvider?.registerCellsForTableView(tableView)
There is one thing left to do. Open AppDelegate.swift and replace the line:
window!.rootViewController = BirthdaysListViewController()
with the following code:
let viewController = BirthdaysListViewController()
viewController.dataProvider = BirthdaysListDataProvider()
window!.rootViewController = viewController
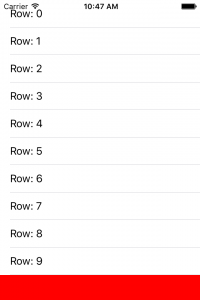
Build and run. You should see something like this:

You can find the code on github.